If you recently bought a snowboard—the key to keeping it around for years to come is to take the time to properly wax your snowboard. Waxing your board is necessary to maintain its health for years to come.
In this article, we explain how to wax a snowboard in the convenience of your home. This might seem like an intimidating part of snowboard maintenance, but once you’ve waxed your board a few times, you’ll realize it’s not too difficult. All it takes is getting the hang of it, and understanding the 4 common mistakes new riders make when they wax their board for the first time (don’t worry, we’ll cover those below).
Why You Need To Wax a Snowboard
First, let’s talk about why you need to wax your board. Does it actually matter?
Waxing your board helps it last longer, and if you’re an avid snowboarder, waxing is an essential part of your maintenance routine.
Wax keeps your board from drying up, essentially hydrating it the same way we need to hydrate after a few long runs. A snowboard base is made up of pores, and when the base gets dry, it makes your board less agile and lowers the performance and overall life of the snowboard.
Waxing your board also helps you ride faster by helping you glide across the snow, more glide equals a better run. When your board doesn’t have that glide, you’ll find yourself going slower, making it harder to transition from one edge to another and inhibiting performance across the mountain.
Do You Need to Wax a New Snowboard?
All boards from Never Summer come with a factory roll-on hot wax This provides a thin coat of wax that is good for about 1 to 2 days of riding. If you are taking a snowboarding trip, we recommend you have your snowboard hot waxed at your local shop or DIY.
Regardless, you’ll need to wax your board in the near future, so make sure you purchase some extra wax. The type of wax you use on your board depends on the temperature of the snow you’ll be riding. Colder temperatures require different wax than warmer temperatures. You’ll see us mention this again below in Step 2, but your wax will be on a color spectrum of blue/green to yellow to orange/red depending on the conditions you’re riding in.
How Often Should You Wax Your Snowboard
Your Never Summer snowboard comes pre-waxed, so you can ride your board for 1 to 2 days before needing to apply new wax. The factory wax tends to last less time than an iron on hot wax.
Generally, you want to hot wax your board every 3 to 4 days of riding. This ensures better glide in varying snow conditions and an overall better performance. Just make sure you’re using the right type of wax for the specific conditions. For example, if you’re going to be riding in cooler temperatures you want to use blue/green wax. If you’re going to be riding in warmer temperatures, the orange/red wax is the best choice. If you need something in between, you can use yellow wax.
How to Remove Old Wax from a Snowboard
Every time you wax your board, you’ll remove the excess wax. If you find yourself removing old wax from your board every time, or there is a lot of excess wax—use less next time. You don’t need a ton of wax to make an impact, you just need enough wax to fill the pores of the base.
To remove old wax from a snowboard, you’ll use either a metal scraper or a plastic scraper. You’ll most likely be removing wax from certain areas of your board that didn’t come into a ton of contact with the mountain or park (like your nose and tail) and not removing much wax from the areas that were in constant contact (like the area between your feet).
The Proper Way to Wax a Snowboard
Waxing is important for the overall performance and fun you’ll have on your board. It’s going to help you glide effortlessly down cat-walks, smoothly transferring from one edge to another, traveling across the mountain, but it will also help prolong the life of your board.
To wax your board you’ll need:
- Waxing iron
- Wax
- Scraper
- Buffing Pad
- Base cleaner
- Optional: A vise to hold your board (or anything else stationary that you can set your board on to)
Before we get into the steps of waxing your snowboard, let’s go over the most common mistakes we see in DIY hot waxing. Read these first so you don’t make these mistakes:
Mistake #1:
Not scraping your board enough and creating a wax build-up
Mistake #2:
Overheating your base by going over and over the same spot with the iron or leaving the iron in one spot for too long
Mistake #3:
Leaving your bindings attached to the board while waxing it
Mistake #4:
Ironing the area under the mounting too quickly
Now that you know what to avoid, let’s get into the 8 steps to wax your snowboard at home.
Steps to Wax Your Snowboard
Step 1: Remove any dirt and old wax with a citrus based cleaner.
Step 2: Choose your wax based on the temperature of where you’ll be riding. An easy way to remember what wax to use in what conditions, is to think of these colors like a faucet, cold temperatures use the blue/green wax, warm temperature wax is red/pink, and all cool temperatures are generally yellow.
Step 3: Set the iron temperature so the wax melts but the iron doesn’t smoke. Generally, you want to set the temperature near 120-140 degrees Fahrenheit (a little warmer in a cold garage). Make sure to always wax your board when it’s at room temperature so the pores will be open and absorb the wax better. A cold base won’t absorb the wax as well.
Step 4: Drip the wax over base. Turn iron upside and drip lines or droplets 1” from the edge (so excess doesn’t run over the edge) with 2”- 4” gap between droplets.
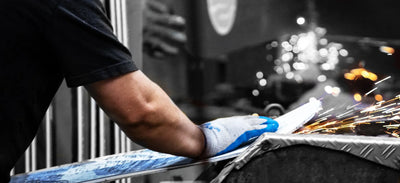
Step 5: Spread the wax using small circles or dragging the iron to melt the wax. Just like ironing clothing, keep the iron moving and never let it sit in one spot. P-Tex pores will only absorb so much wax, so there’s no need to go over and over the same area. Doing that will only overheat and damage your board. Spread the wax evenly across the entire base of the snowboard, even the nose and tail need wax to help maintain the base and glide smoothly across contours in snow.
Step 6: Let wax cool down for 5-10 minutes.
Step 7: Scrape off all of the excess wax from the nose to tail. We prefer a metal scraper because it can be easily sharpened and quickly takes off the wax, but a plastic scraper is fine. Scrape from the nose to tail by pushing the scraper away from you, this will give you more power and leverage while you’re scraping. You only want to leave the wax that was absorbed into the base and to scrape off the rest of the wax for optimum performance.
Step 8: Buff off any excess wax using a Scotch-Brite scouring pad. This will help put an even, slippery sheen to the base. You can also use the pad to clean off any wax that might have run over the edge.
If you don’t want to wax your board, you can take it to a snowboard or ski shop or if it’s a Never Summer board, you can send it to us to be tuned and/or repaired.
Waxing your board may seem intimidating, but once you get the hang of it, you’ll feel a lot more confident. Just remember to look over the common mistakes we mentioned above each time you get ready to wax your board. After a few times waxing your board, you’ll be able to do it without much thought, and if you’d rather have us do it—feel free to send your board over.


