 Made in Colorado









1. CORE BLOCK
- Every snowboard starts out as a block of laminated wood known as a core block. For sustainability we use a blend of Paulownia, which is one of the fastest growing hardwoods on the planet, Poplar and Beech in high stress areas. Creating a great strength to weight balance. We have also recently added Bamboo to a few of our core blocks. Each core block consists of six to eight snowboards.
- For cost efficiency we use several local services to custom mill our wood cores to our specifications. Having our own wood shop allows us to laminate specialty or low volume core blocks for products, such as very wide boards, split boards and kids boards.
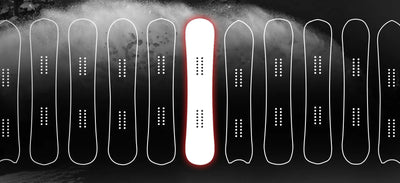
- After the core blocks are assembled the radius is cut into the block. Each model and size has its own sidecut template; the sidecut determines the radius of the turn of that model. These sidecut templates are made in-house; having our own wood shop not only allows us to customize our wood cores but also to make tooling like these templates. The sidecut is cut manually using a band saw and then shaped in an auto feed router. The UHMW (Ultra High Molecular Weight Polyethylene or P-Tex) sidewall is then attached or glued to the block for a 24 hour curing or drying period. The block is then sliced into 6 to 8 individual cores.

2. DRILL/TAPERED CORES
- once the blocks are cut to individual cores, they are then drilled for the mounting holes and run through a programmable wide sander to taper the core for precise flex. Owner/Designer Tim Canaday designs each core thickness or deck height to the millimeter to capture the exact flex for the type of riding or conditions the model/size is meant to be used for.


3. CORE/MATERIALS PREP
- After the cores are tapered, the nose and tail shape is die-cut or punched out. The cores are then mapped out so a builder will know precisely where to place the carbon fiber and the centerline of the core is marked. Materials, like rubber for vibration damping, fiberglass for strength and performance are cut to length here and a plastic or rubber fill is attached to the ends of the board, to seal up the core and add protection.
4. BASE ASSEMBLY
- Graphics are die cut and assembled together.
- The UHMW (Ultra High Molecular Weight Polyethylene) or commonly known as P-Tex, is cut into lengths of the size of boards we are making. Typically, these are two different colored pieces. A logo will be stamped out using a die-cut press of each color. The opposite color will be rolled into the base (like a puzzle) on a vacuum table that holds the pieces in place.
- The installed logo pieces will then be taped over so they stay flush in the press and don’t fall out. We will use the other pieces or “flip flop” so we are not wasting any polyethylene. A stack of bases with the installed graphic will be then laid under a magnetized hydraulic press with a template of that board shape is then pressed down on the bases. The shape is then cut out by hand.
- The decals are cut from one color, and the background from a different color. However the cutouts are identical, so from one sheet of PTEX, they get both a graphic and a background. The edges come in as a long roll of steel edge. They are rough shaped by machine, and then course shaped to the desired radius by hand using a pair of specially made crimping pliers and bent around the shape of the base. The edge is then glued to the base material, or PTEX.

5. CASSETTE PREP
- The base goes into a cassette, a form of that board shape that has been precision machined out of aluminum. This form holds the shape and keeps materials from slipping or moving from one another. There is a set of these cassettes for each board shape and each size of that model. The base is then adhered to the cassette with a fast tack adhesive.
6. LAYUP/BUILDING OF BOARD
- This is one of the most interesting steps.
- A layer of 2-Part Epoxy spread across the base, rubber stripping is laid around the edge, then a layer of biaxial fiberglass, more epoxy, and then the wood core. On top of the core goes any strategically located carbon stringers and pre-tensioned fiberglass that need applied, and the top sheet that gives the board it’s graphic. Think of it as making a sandwich, you have the two plastic pieces are the bread, wood core is the meat. And then a thin layer of glue (mayo or mustard depending on your taste) and rubber is added around the perimeter of the base, fiberglass, more epoxy, carbon fiber, wood core, more epoxy, rubber, more fiberglass and top-sheet. These layers are then sandwiched/pressed together with heat and pressure.
- A seasoned board builder can lay up a board in 10 minutes


7. PRESS
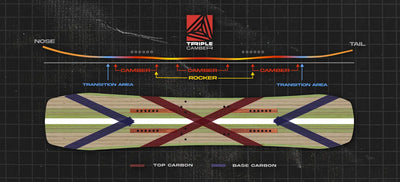
- Once all of this is completed, the board goes into a vacuum press where all of the layers are drawn together under vacuum. There are two parts of the mold set, both of which are made here. The top mold with an air bladder and a machined aluminum Rocker Camber and upturned kick plates. Hydraulic pressure is applied, as well as heat in order to press all the materials together and our patented Rocker Camber profile and upturns in the nose/tail into the board.. After roughly 19 minutes and around 180 degrees, the board comes out and is ready to begin the finishing process. Each board is individually inspected straight out of the press to determine if there are any flaws and adjustments made in build or press temperature
8. CUT/ DRILL/TOP-SAND
- The boards come out of the cassette square, someone takes the time to remove the flash, or extra material, from the board to give it the final shape that makes it look like a snowboard (this is done with Band saw with a technician using the metal edge as a guide). Two magnetic mounting inserts are located and drilled out (this is an interesting step for your viewers).
- A jig is screwed down onto the drilled out magnetic inserts and then the remaining inserts are drilled out. The rough cut of the band saw is then top sanded or smoothed out with a dynabrade sander

9. FINISHING/BASE & EDGE GRINDING
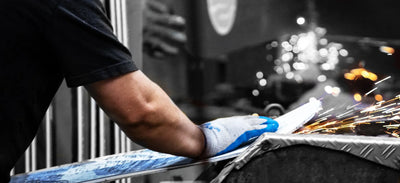
- Excess glue needs to be removed from both the base and edges. This is done through a series of base and side edge grinding. Never Summer boards come fully tuned from the factory. The boards are run over several stages of base sanding from course to super fine belts to get that perfectly smooth base. Then they are sharpened, waxed, and sent to the inspector before shipping.

10. FINISHING/GRADING/FINAL QUALITY CONTROL
- Protective tape is peeled off the top-sheet and a razor blade is manually run around the perimeter of the top-sheet of the board to smooth out the sides and provide a bevel to reduce the risk of a hard object catching the top-sheet. The technician will then complete a 20-point inspection to ensure the boards is an “A” quality to be sent to an authorized retailer or at neversummer.com
11. SUBLIMATION/PRINTING TOP-SHEETS TECHNICIAN
- Graphics are printed on a clay-based paper using water based inks. The print is a mirror image of the graphic, so when it flipped over onto the top-sheet material it’s right side up.
- The top-sheet material is a waterproof, weather resistant co-extruded polymer or nylon based thermoplastic. It is designed not so much as a protectant (as the board is sealed with a fiberglass/epoxy beneath) but to put a graphic into. It is then cut to the length of the board. Temperatures and times are calculated depending on the color tone of the graphic.
- The polymer/nylon top is put into a hydraulic press and the graphic is sublimated into the thermoplastic. The polymer is molecular so under heat the molecules open up to allow the inks/image to penetrate and absorb into the material and not just onto. This is key to keep the graphic from getting scraped or scratched off; it literally becomes part of the material.
- The sublimation process really “pops” the colors on the top-sheet. The final step is to adhere a protective tape over the top sheet to keep it from getting scratched or damaged in the manufacturing process. The tape also adds some grip to run through the base grinders that are circulating emulation.
- We are constantly working with our supplier to source or have made unique textures and finishes, that not only look amazing but also provide a “built in” stomp pad for getting off the chair lift.


