Snowboarding is not just a sport for so many of us, it's a way of life! And if you're like us or our employees here at Never Summer and are a die-hard snowboarder, you know the importance of keeping your board in tip-top shape by tuning your snowboard at home to get the most out of your day on the mountain. Proper maintenance will not only prolong the life of your board and your boards base, but also make you a better rider in your performance on the slopes. A good rider needs the best they can get to achieve their maximum performance. We are going to discuss the essential tools for snowboard maintenance and the best methods for waxing and tuning at home.

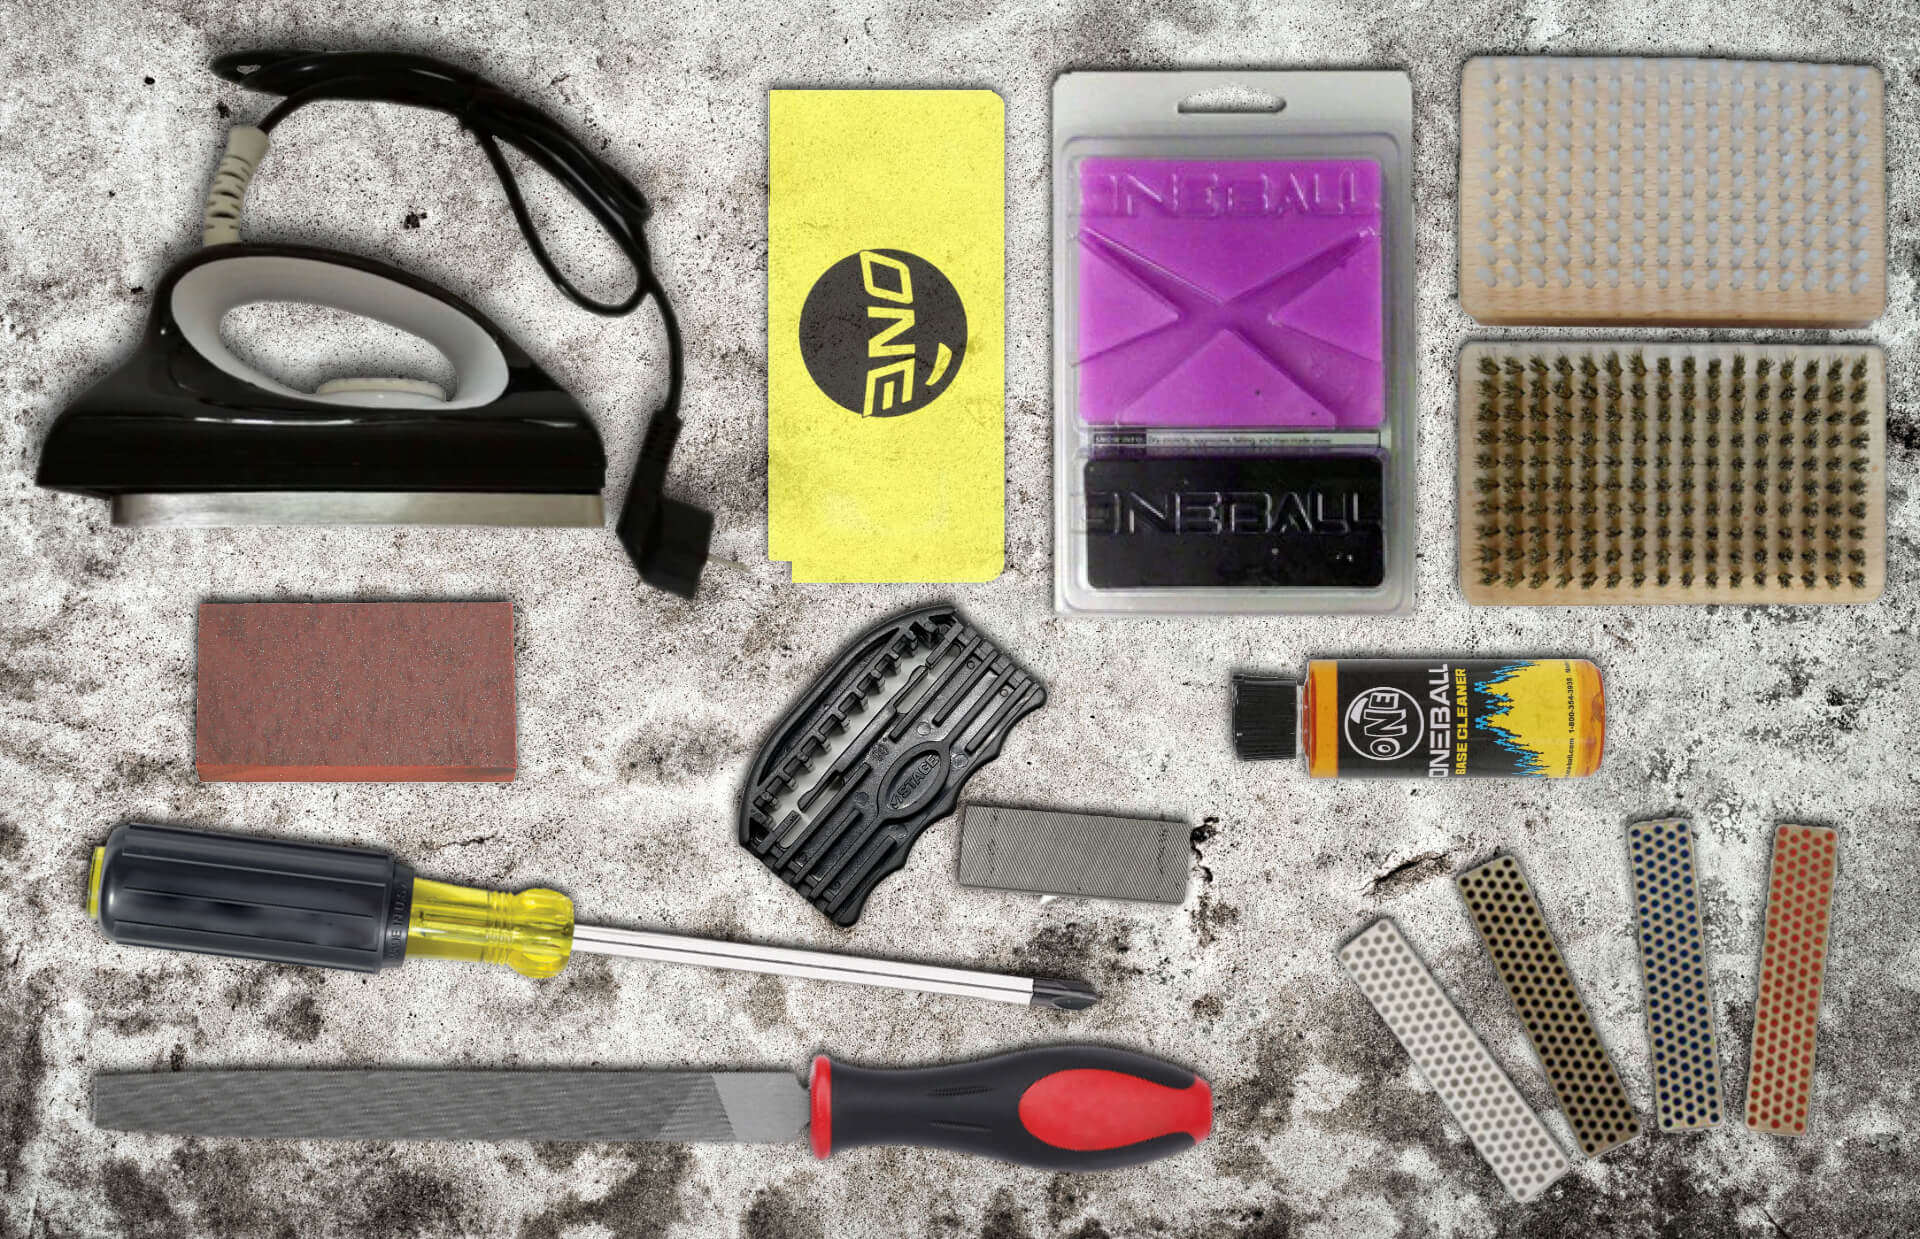
Tools You'll Need (Essential tools are highlighted in bold):
Snowboard Wax (Make sure you have the right temperature or an all-temp wax)
Waxing Iron
Screwdriver (Phillips #3)
Scraper
Base Cleaner
Edge Tuner or File Guide
File
Diamond Stone
Gummy Stone
Brass Brush
Nylon Brush
Home Tuning and Waxing:
Step 1: Clean Your Base
To start your at home tune up, you first need to clean your snowboard's base. You have two options here, apply base cleaner to the base (easily found at your local shop) and let it sit for a few minutes. Then, using a scraper, remove the dirt and grime from the base and clean up with a towel or a paper towel. Your second option is the hot scrape method to clean the base. We suggest the hot scrape method as it is better for your base and works as a base prep wax. Always before using a wax iron on your base, it is highly recommended to loosen your binding screws or remove your snowboard bindings completely. Apply a base prep or all-temperature wax to your board using your iron. Spread the wax evenly across your snowboard. This can be done with the drip or chalk method. The drip method is when you use your iron and wax to drip small amounts of wax on your snowboard base then smooth it out with the iron so the entire base is covered evenly with wax (this is a really easy way to use too much wax, so if you’re new to waxing, use the chalk method.) To do the chalk method, you touch the iron to the wax for a brief moment (just a second or two) then draw the bar of wax across the board like you would with chalk on a sidewalk with the part you just touched to the iron and repeat. Smooth out the wax with the iron so the entirety of base material is covered evenly. Remember, a little bit of wax goes a long way. Scrape the base after either method while the wax is still warm and it will clean the dirt and debris from your base.

Step 2: Wax Your Board
Now that your board base is clean, it's time to apply wax. Don't forget, if you haven't yet,it is highly recommended to use your screwdriver and loosen your binding screws or remove your snowboard bindings completely from your board before using a wax iron on your base. Using your wax iron, melt the wax onto the base of the board. This can be done with the drip or chalk method described in Step 1. Make sure to evenly distribute the wax across the entire base. Let the wax cool for at least 20 minutes before scraping off any excess wax. This will ensure that the wax has properly penetrated the base of your board. This is the same method that shops use when you get a “hot-waxing”, “hot-wax”, or “Iron wax”. Sometimes a “hot-wax” is a machine wax, so make sure to clarify with your shop when getting your board serviced. Once you are done waxing, don't forget to tighten your snowboard binding screws so your bindings are safely attached to your board again.Step 3: Sharpen Your Edges
Tuning your snowboard is essential to keeping it in peak performance. Sharp edges ensure a smooth ride on the slopes. Using your edge tuner, sharpen the edges of your board by running the file along the edge at the angle the tuner has (most have 89-90 degree options). Then, use your diamond stone to smooth out any rough edges that may be left from the file. Make sure to use the file and diamond stone on both your base edge and side edge. Finish off the sharpening by using a gummy stone to remove any burrs and imperfections. A diamond stone and gummy stone are great things to keep in your travel snowboard kit in case you ding a rock or zeach a rail causing an edge burr.

Step 4: Brush Your Board (Optional)
After you've tuned and waxed your snowboard, brushing your snowboard removes excess wax and debris. Use a brass brush to remove any excess wax from the base. Following the brass brush, use a nylon brush to smooth out the base and remove any remaining debris. There are so many brushes out there and it's all about finding the best combination that works for you. Hint: Brushing and scraping from tip to tail increases speed while riding your normal stance.FAQ:
Q: How often should I wax my snowboard?A: It all depends on how often you ride. The more that you go up to the mountain and ride, the more you should wax. A good rule of thumb to follow is waxing your snowboard every 4-6 days of riding, but you’ll learn your own schedule after just a few waxes. You also have to wax more if the snow is more abrasive like early season man made snow or slush and less if the snow is less abrasive like powder. Re-wax when it looks like your base is starting to dry out anywhere!
Q: Do I need to sharpen my edges every time I wax my board?
A: No, it is not necessary to sharpen your edges every time you wax your board. However, it is good to check your edges regularly when being done riding or when you’re waxing and sharpen them when they start to feel dull. You can also get “burrs” on your edges from rocks or rails that may make your board feel grabby, so make sure to fix these with your edging tools.
Q: Can I wax my board without an iron?
A: No, you need an iron to properly wax your board. You can use rub-on or spray-on wax, but best results come from an iron on wax. Don’t worry however if this seems like alot, you can always get this done at your local shop!
Q: Do I need a specific kind of wax for my snowboard?
A: Yes, you need snowboard wax. It comes in all varieties of temperatures or an all-temperature wax. You cannot use candle wax.
Q: How do I fix scratches and gouges on the base of my snowboard?
A: A p-tex candle is the best way to go about this at home, unless you have the money for a p-tex gun (pretty much a super hot glue gun with a metal plate to help apply p tex candles) Base repair is an advanced at-home repair technique, click here to learn more.


